|
Windows 7 |
  
|
|
Windows 7 |
|
In order for other computers on your network to see the ezHealthWare software database, the folder that holds the database file needs to be made visible to other network computers. This process is called "sharing" the folder. You also need to allow other users to make changes to the file (this is called giving "permissions". Before going further, make sure all computers are in the same Workgroup.
We recommend against using the Windows 7 "HomeGroup" feature for office environments. Besides it is incompatible with Vista and XP if you have multiple operating systems in your workgroups.
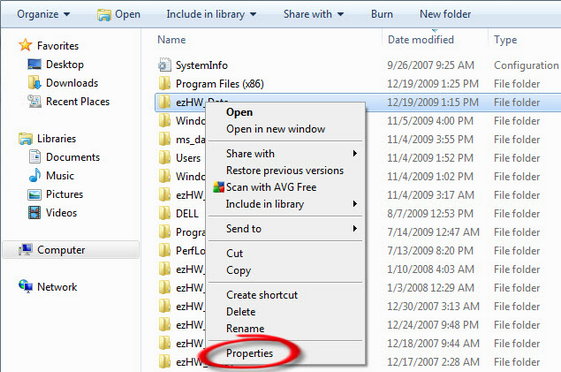
Step 1 - Open the drive that contains the ezHealthWare software database (typically "C:\ezHW_Data"). Right-click the folder, and choose the Properties option.
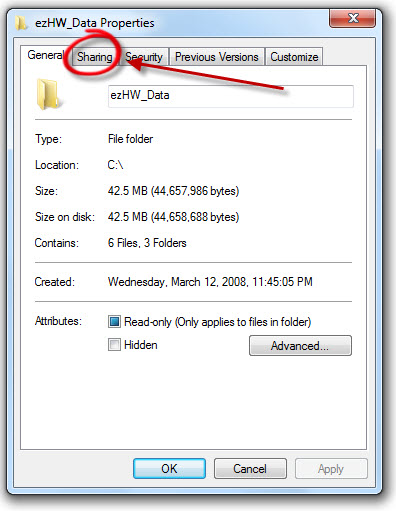
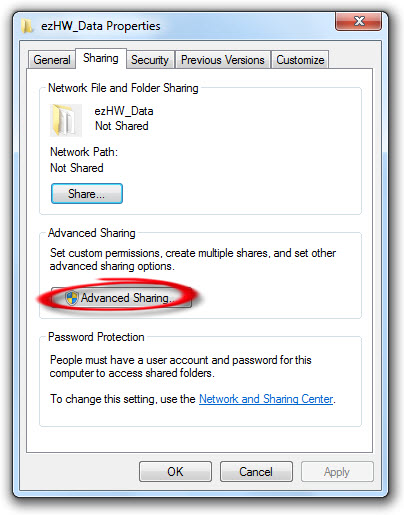
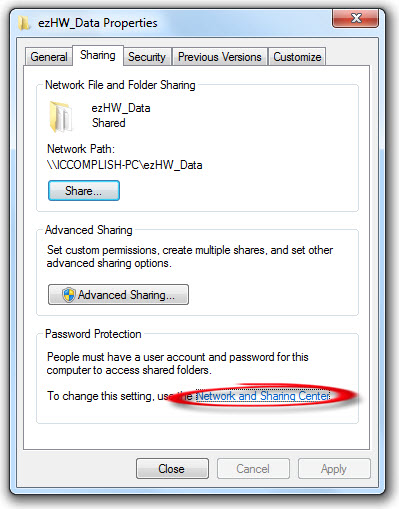
Step 2 - In the section titled "Sharing" click the "Advanced Sharing" button.
Step 3 - Check the box “Share this folder”, and choose a share name (we recommend the default "ezHW_Data".
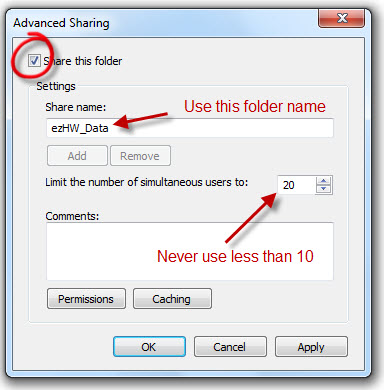
Step 4 - Change the number of simultaneous users to AT LEAST TEN (10), but you can leave at the default 20.
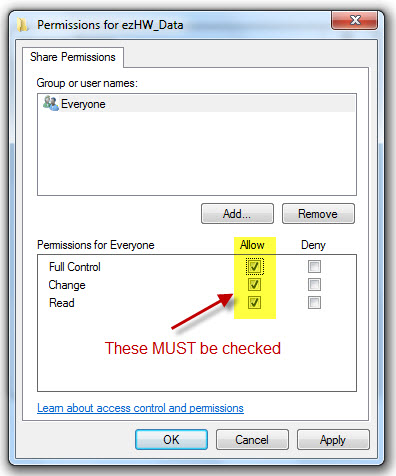
Step 5 - Click on the Permissions button (shown above). The Permissions dialog will pop-up. You can add individual users or more conveniently just select "Everyone", since more than likely all your office users will want to use ezHealthWare software. Note that the software itself controls who can sign-in to the software, so you don't need to set a user password for the folder sharing.
NOTE: For each user you give access (or for the "Everyone" group), you need to check Allow for each of the permissions (Full Control, Change and Read). If you fail to do this, you will not be able to make changes to the database!
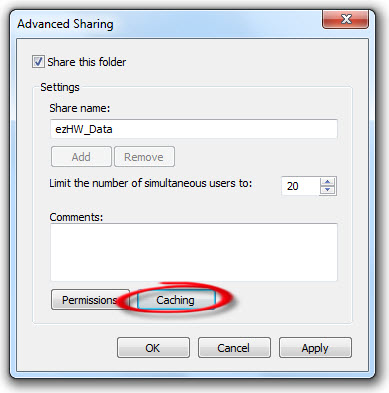
Step 6 - Back on the Sharing screen, click the Caching button.
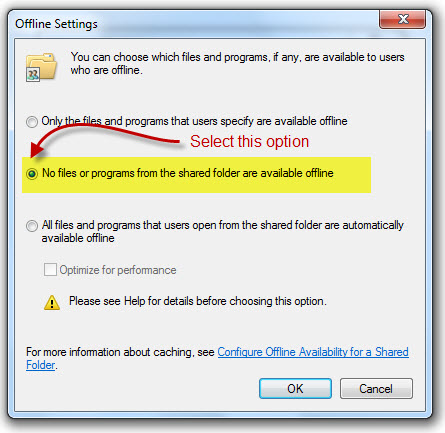
Step 7 - Select "No files or programs from the shared folder are available offline". You don't want to be making changes to the database when it's disconnected from the network or you will lose data.
Step 8 - If you wish to be able to log into the network folder without enter a password each time (or at Windows startup), then complete the following steps:
On the screen that appears, go to the bottom and check "Turn off password protected sharing".
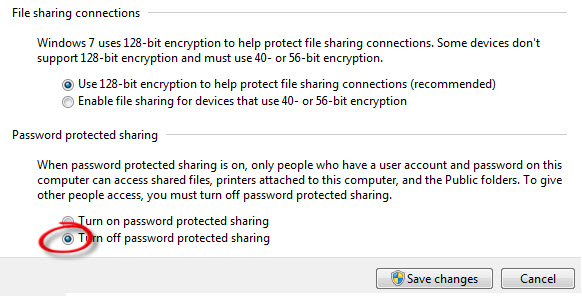
NOTE: If you leave on password protected sharing, you should probably create a specific user account on the Windows 7 computer for this purpose.
Step 9 - Change the attributes of the folder so that it is not Read-only:
![]()
![]()
Unfortunately, unlike prior versions of Windows, there is no obviously visual indicator that the folder has been shared successfully (other than being able to navigate to the folder via another network computer).