|
Refraction Tool |
  
|
|
Refraction Tool |
|
The Refraction Tool is used to enter most of the refractive data into the encounter. It includes several major parts: (1) the Subjective Refraction, (2) the Final Rx and (3) Additional Data section.
Subjective Refraction
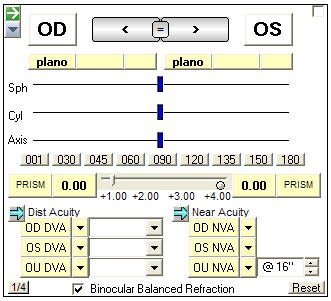
When you first open the Refraction Tool, all the sub-tools are in a blank (empty) state. There are some shortcuts to entering data which will be described in detail below. Also, the basic operation of the Diopter Power tool sliders/buttons should be reviewed.
Data Entry Shortcuts:
| • | AR and Lensometry Data - click the green arrow at the top left corner to display the options |
| • | Keyboard entry of numbers - click the Dropdown arrow (under the green arrow) |
| • | Fill Visual Acuity as All Normal - click the blue arrow next to the acuity type |
Final Spectacle Rx
It is possible to enter up to three distinct finalized spectacle prescriptions (with notes and recommendations). Simply click on the tabs (in order) to create the new Rx. The green shortcut button allows copying of the subjective refraction from above.
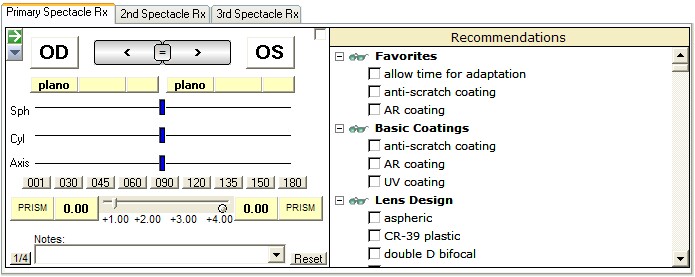
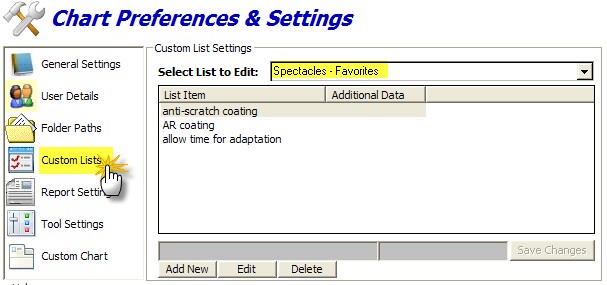
The Recommendations list (including the Favorites) can be customized using the Customize button.
Additional Data
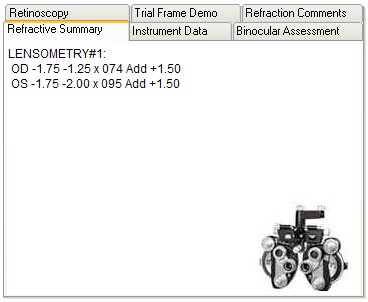
There are six available Additional Data screens that relate to the Subjective Refraction. The default is the Refractive Summary, but using the Customize button you can select which tab displays on opening.
Refractive Summary
An overview of instrument data that was imported (or hand-entered). This can include AR/AK and Lensometry data. This data is for reference; to actually get the data into the tool you need to use the green arrow shortcut button.
Instrument Data
The raw instrument data that was imported will be displayed (only if you imported instrument data). Useful if you wish to see additional details (e.g. multiple auto-refraction readings rather than the average).
Binocular Assessment
Allows for entry of binocular assessments such as phoria, vergence and accommodative testing.

Retinoscopy
If retinoscopy is performed it can be entered here (or on the Automated Instrument tool by selecting the Manual checkbox). It flows more naturally by entering it here, since you can enter acuities as well. Data entry is by the standard Diopter Power tool.
Trial Frame Demonstration
If you wish to add a statement indicating the results of spectacle trial framing you can use this tool.
Refraction Comments
It is possible to add a statement regarding the process of the subjective refraction (e.g. "the patient responses were inconsistent").
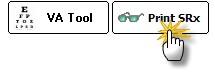
Print Rx
The Print SRx button at the bottom of the Refraction Tool is how you convert the onscreen data into a printed spectacle Rx.
After clicking the Print SRx button you will have the option to indicate how you want the Rx to display in the Plan section of the SOAP note. For exam, you can indicate if a change is indicated or whether to defer the spectacle Rx release (in which case your would select the Save button, not the Print Now).
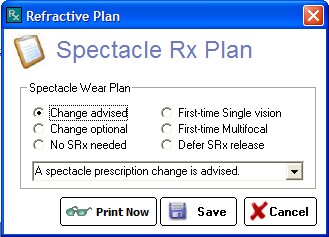
Save Button
The Save button immediately inserts the spectacle Rx (and plan notes you have selected) into the SOAP note.
Print Now Button
The Print Now button will open the onscreen spectacle Rx ("Prescription Pad") for final review. You can cancel if you still need to make changes (for example, if you forgot to enter recommendations or notice a typographical error).
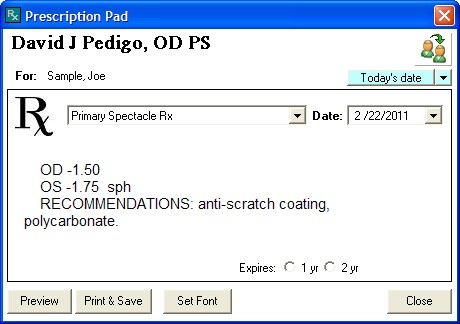
There are several parts to the Prescription Pad: the Doctor/Provider name, the Rx Date, the SRx Report type, the Rx body, expiration date options, font settings, Preview, and Print & Save buttons.
Customize
You can customize some of the information on the Refraction Tool, including: Near point VA distance (defaults to 16" or 40cm), the binocular balance default and Additional Data tab that will be shown by default.

To modify the list of Recommendations in the Final Rx tool, click the Customize button then select Custom Lists on the left-side menu. In the dropdown, select the type (e.g. "Spectacles - Favorites"). Then click Add New button to add to the list.